Today we are going to teach you how to easily make a hanger for your plants with macramé. A very popular decoration in the 70’s, it’s come back in fashion in recent years. What better mix of crafts and nature could there be?
These are the materials that you are going to need:
1 skein of our yarn The Tape
1 large ring
Scissors

Now let’s see how it’s made:
Step 1: Cut 8 strands of tape about 2 meters each and pass them through the ring. Place the ring in the center to leave 16 pieces hanging– about one meter each.

Step 2: Take one of the strands and roll it over the others, near the ring, to group them as shown in the photo.

Step 3: With the help of a needle, pass the tape underneath to fix the starting knot.

Step 4: Secure the work with pins on a cardboard surface to make it easier for you to work. Separate the strands into 4 groups of 4.

Step 5: To make the first knot to the right, take the first strand and form a 4 by placing the tape over the others.

Then take the fourth strand and pass it over the first, as the photo shows.

Pass the fourth strand under the two strands that remain in the center. Then, pass the fourth strand through the gap of the 4.

Finally, carefully pull to form the knot and adjust it.

Step 6: To make the second knot, we’ll do the dame but to the left. Take the fourth strand and form a D, placing the strand on top of the others.

Then, take the first strand and pass it over the fourth.

Pass the first strand under the 2 strands that remain in the center. Then, pass the first strand through the gap of the D.

Finally, carefully pull to form the knot and adjust it.

Step 7: Repeat the knot sequence in steps 5 and 6 four times to form the first bunch of knots.
Step 8: Start the knot in step 5 again. However, don’t adjust it at the bottom, but rather about 5 cm from the last knot, as the picture shows.

Then, repeat the knot sequence until you have done steps 5 and 6 four times.
Step 9: Repeat step 8 and the knot sequence of steps 5 and 6. At the end, you will have 3 groups of knots separated by 2 spaces of 5cm each.

Step 10: repeat steps 5 to 9 with each one of the 4 groups of 4 strands.

Step 11: Now the moment to cross the groups of strands has come. For this, grab strands 3 and 5 of the first group and strands 1 and 2 of the second.

Step 12: Keep a space of 10 cm and make the knot sequence of steps 5 and 6 twice.

Step 13: Repeat step 12 until you have crossed all groups of strands.

Step 14: Take the pot that you are going to use for reference, leaving enough space so that it fits, make a final knot with the ends of all the strands of tape.

Step 15: Cut the ends of the tape so that they are even.
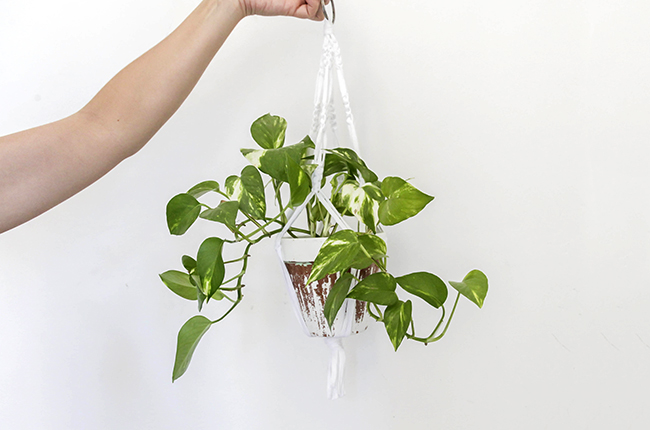
This is how we made this simple macramé plant hanger. You can make it as long as you like by repeating the sequence of steps 5 through 9. Note that to make it longer, you will need to use longer pieces of tape. We advise you to be generous with the length, as it is always better to have too much, rather than having to redo it all because you ran out of yarn.
As always, we encourage you to share your creations with us on Instagram, using the hashtag #weareknitters. We’d love to see how your plants will look in this classic macramé work!